Monday, May 1, 2017360 Capture In UE4 With Nvidia Ansel
Ansel is a toolkit by NVIDIA that enables users to take state of the art in game photographs. It comes with a rich feature set that overcomes the limitations of traditional screen capture methods. Ansel supports 360 and stereo screenshots, making it easy to create content for virtual reality. Super-resolution takes place on the graphics card, allowing users to break free from their 1080p monitors and capture screenshots at insane resolutions (I just took a 2.3 gigapixel screenshot!) Users have full camera control, can apply post processing filters, visual effects and take photos using HDR.
I’m going to walk you through how to add NVIDIA Ansel to your Unreal project and start taking absolutely stunning VR screenshots.
1. Ensure your computer is set up to use NVIDIA Ansel.
In order to use Ansel your computer will need a compatible graphics card. For this you will need a NVIDIA GTX 780 or better running with GeForce 372.90 or newer drivers. If you aren’t sure if your card supports Ansel check out the official list of supported graphics cards.
You will need to be running Unreal Engine 4.14 or later. If you don’t have Unreal yet, you can find it on their website with loads of resources on how to get started.
2. Load up a project in Unreal Editor.
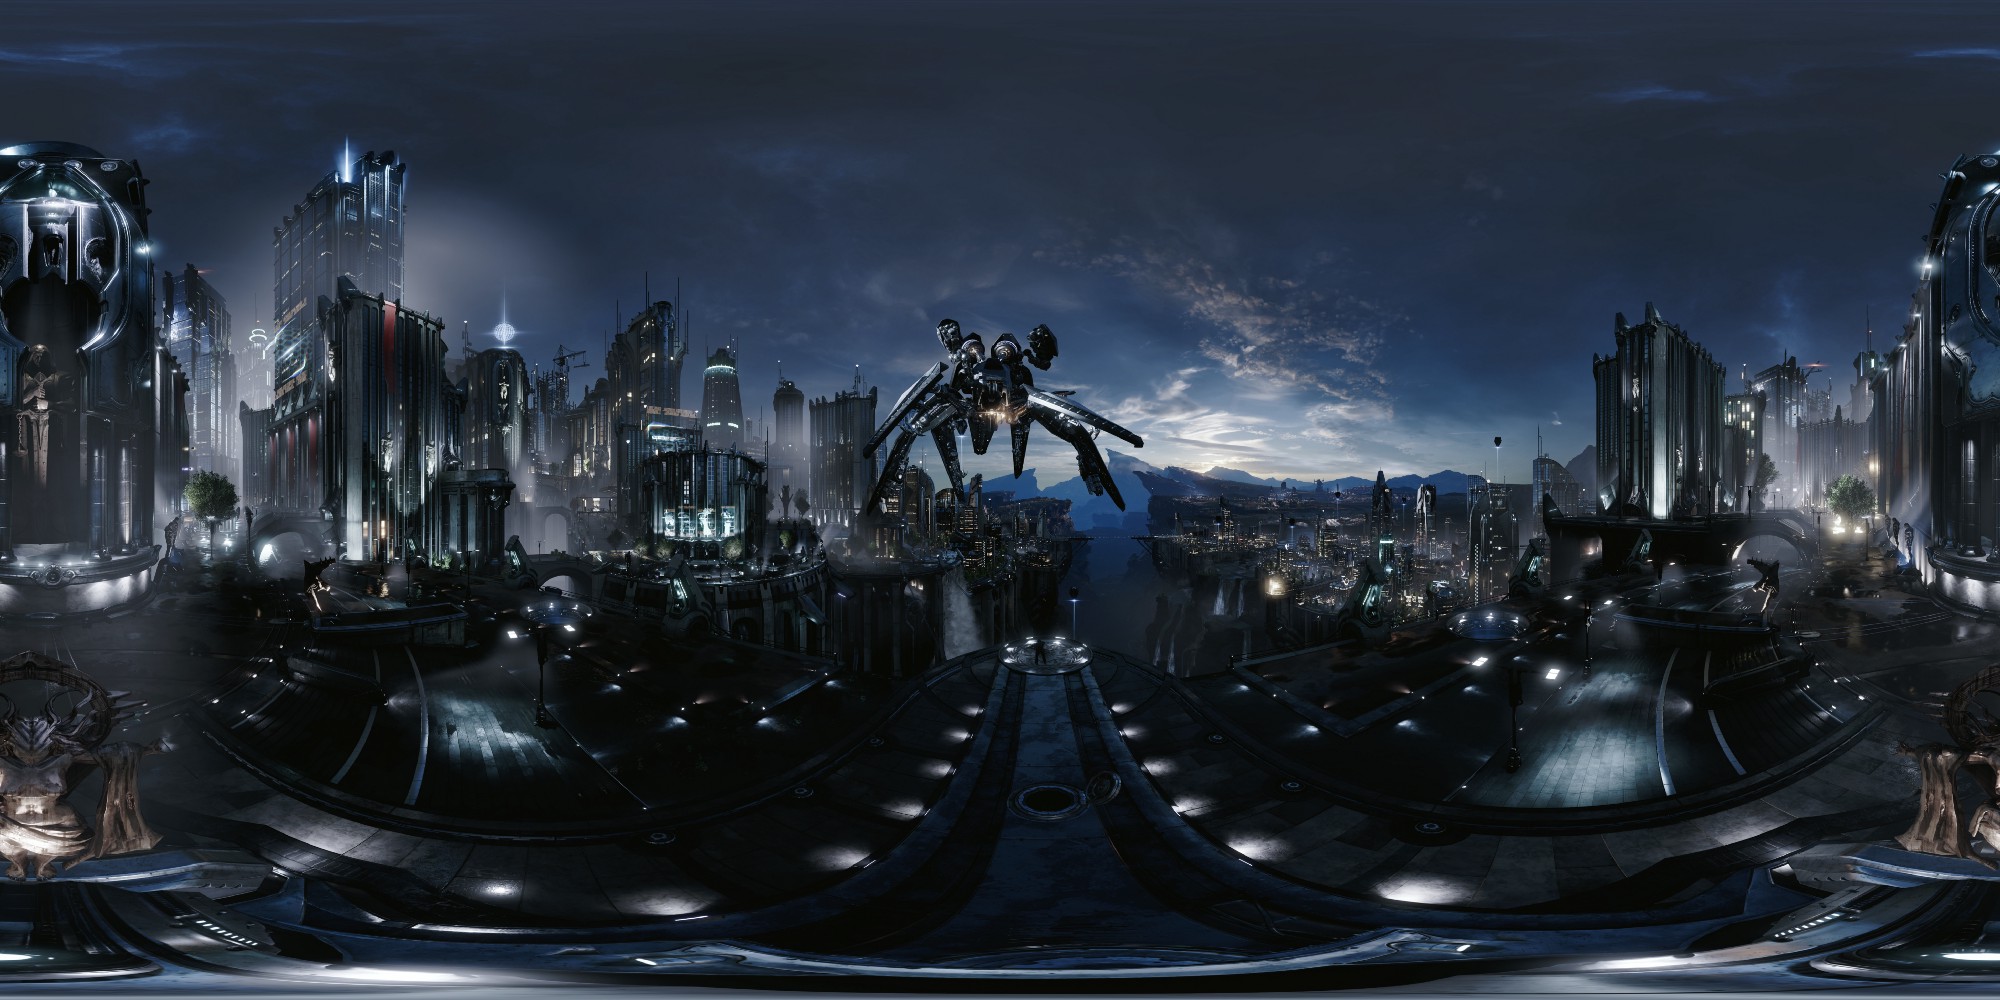
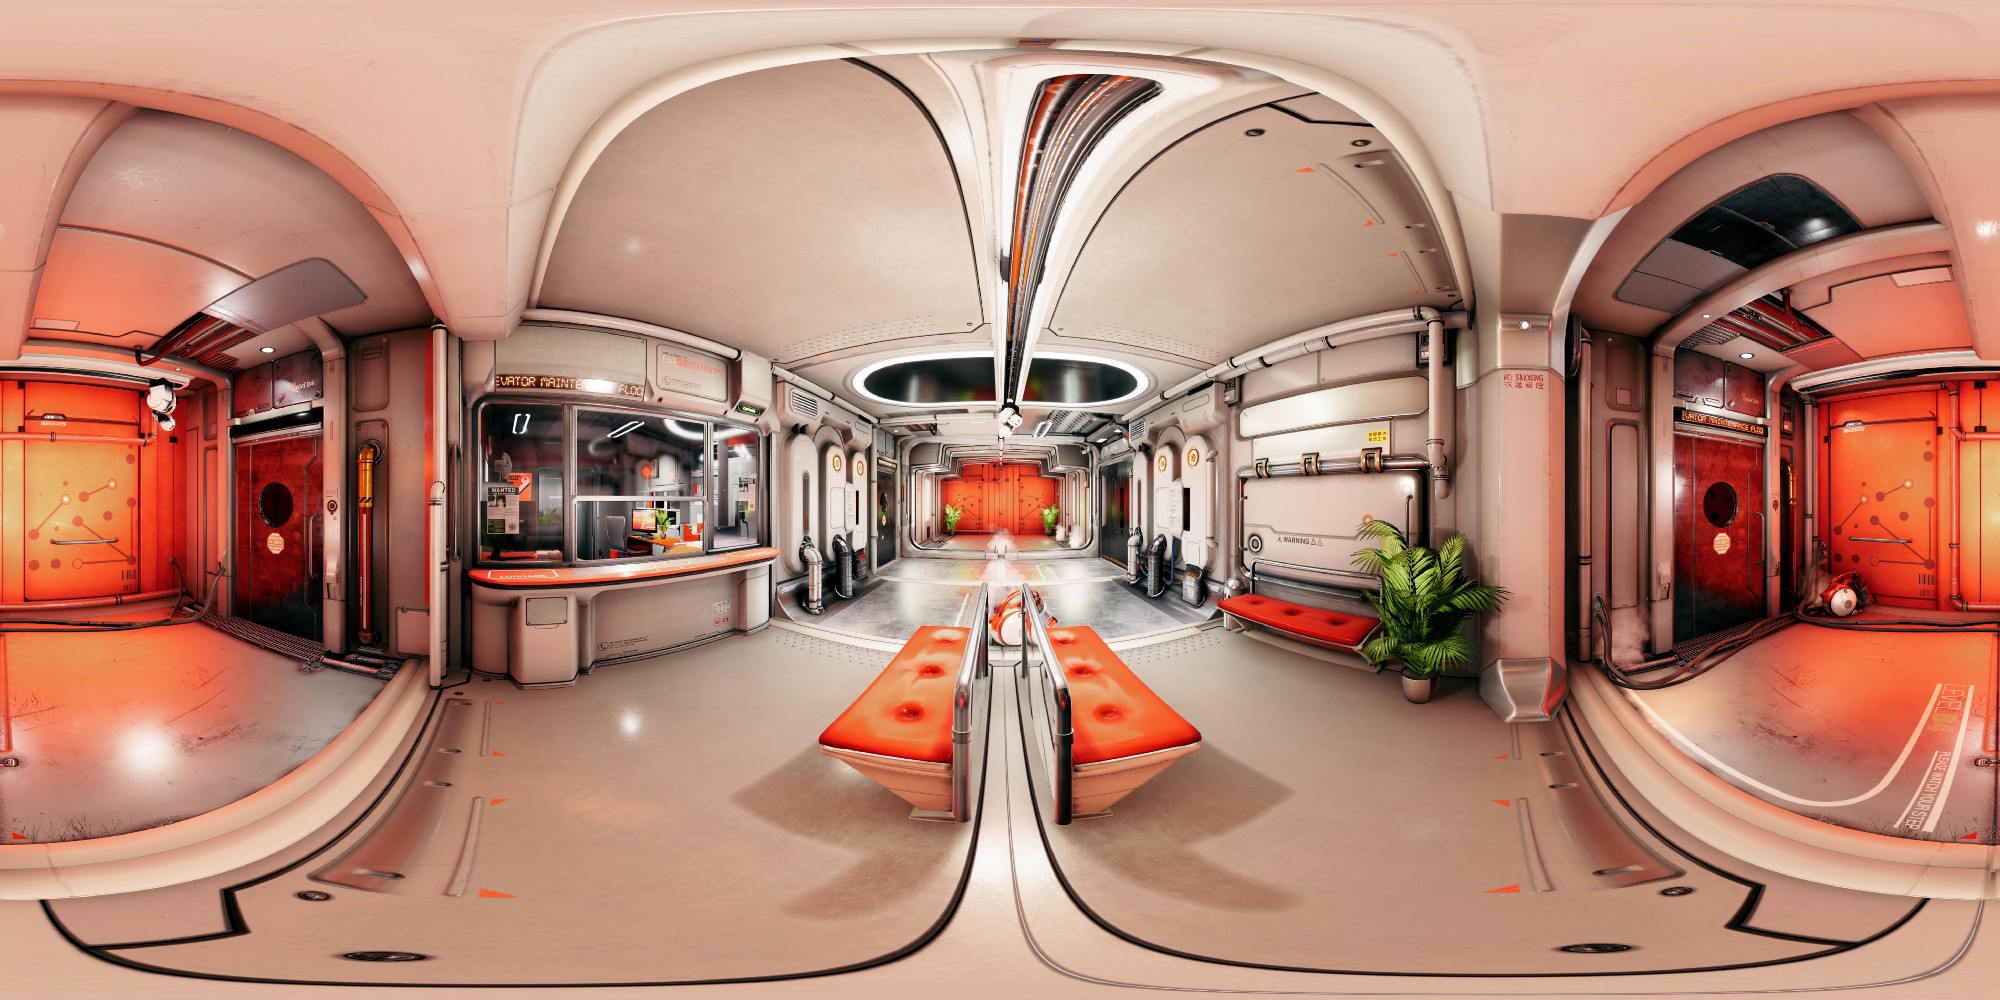
Open up the project you are looking to capture. If you don’t have one ready that is fine too; Unreal provides a lot of AAA quality demos that you can use. I suggest using the Infiltrator Demo or SciFi Hallway, which are ready to run projects that can be downloaded from the Marketplace. Another option is to create a blank project and import other maps from the Marketplace, like the Infinity Blade Grass Lands.
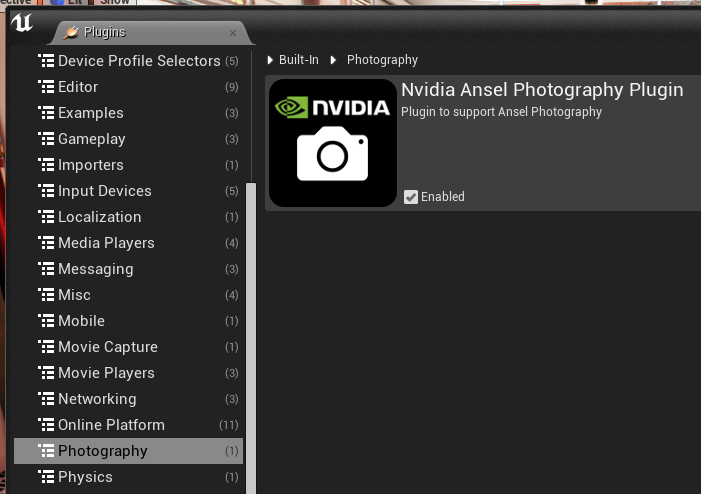
3. Enable Ansel Plugin in project.
Next we need to enable the the Ansel plugin in your project. To do this click on Edit -> Plugins. From there you can navigate to the photography section and click on Ansel and enable it. After activating the plugin Unreal will need to be restarted.
4. Configure Ansel and white list project.
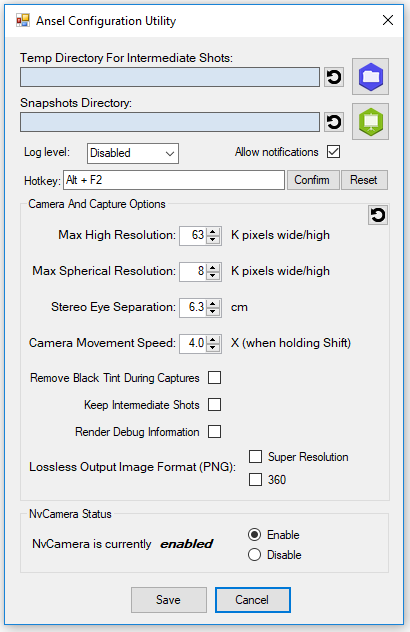
Before we can start taking pictures, we need to make sure Ansel is configured for the current computer. Press Win+R to open the Run dialogue, then enter the following:
C:\Program Files\NVIDIA Corporation\Ansel\Tools\NvCameraConfiguration.exe
This will open up the Ansel Configuration Utility. You shouldn’t need to change much, just make sure NvCamera Status is Enabled.
By default, Ansel is set up to only activate on white-listed games. Since development projects aren’t on the list we’ll run a command to white-list everything.
In order to do that we’re going to run the same command as before, but this time we will pass the whitelisting-everything argument to it. To do so, press Win+R to open up Run, then enter the text below:
C:\Program Files\NVIDIA Corporation\Ansel\Tools\NvCameraEnable.exe whitelisting-everything
This allows us to use Ansel in any game which supports it. If you ever want to undo this, run the same command as before but with the argument whitelisting-default.
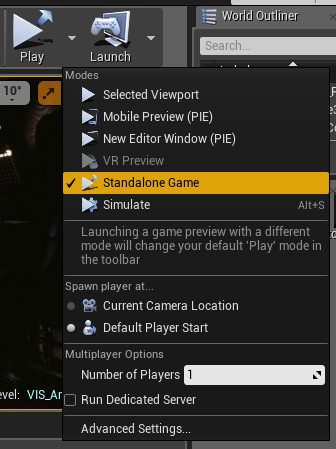
5. Run the game and take some shots.
Now that you are all set up, let’s have some fun and take some shots. Go ahead and launch the game in standalone mode by pressing Play -> Play Standalone Game.
Once the game has launched bring up the in-game Ansel menu by pressing ALT+F2. Depending how your computer is set up, things might look a little funky at this point. It just so happens that F2 is the shortcut to disable real-time lighting in Unreal, so you will want to press F3 to re-enable real-time lighting. In order to avoid this from happening in the future, you may want to change the keybindings for Ansel using the configuration utility we ran earlier.
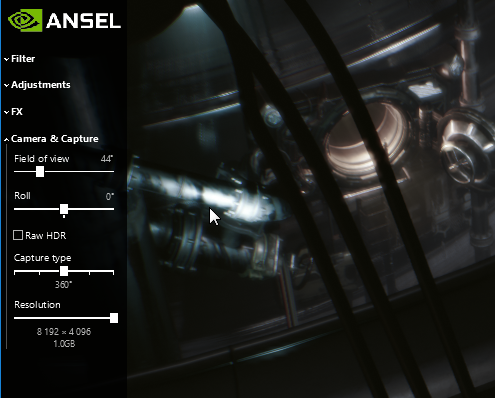
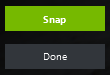
Now that Ansel has launched, use WASD and your mouse to move the camera into the desired position, click here for a list of controls. Once you have your shot lined up you may select various filters, visual effects and settings for your picture. I suggest to start off with 360 — if you plan viewing with a VR headset give stereo 360 a shot. Once you’ve lined up the perfect pic press the Snap button.
Your screenshot will be located in your user’s video folder, for example if your username is bobbarker then your image will be at C:\Users\bobbarker\Videos\UE4Editor.
6. What’s next?
Now that you’ve discovered the beauty of Ansel, what’s next?

You can view your art in VR, share your shots with friends and family using Facebook’s 360 image viewer, make a Tiny World pic and of course you could always tweet me your favorites.